How to Build a Field Management App with NotionApps (Step-by-Step) in 2025
Learn how to build a powerful Field Management App in NotionApps with this step-by-step guide. Manage tasks, teams, and operations seamlessly using Notion databases.
Dec 23, 2025
Introduction
Field teams handle diverse responsibilities, from managing orders and tasks to coordinating appointments, overseeing client accounts, and keeping track of product catalogs. Depending on the operation, field work can include inspections, deliveries, servicing, audits, or inventory management, each demanding accurate tracking of specific data points such as status, schedules, quantities, or customer feedback. A field management app streamlines all these activities into a single organized platform, enabling on-ground teams to efficiently create, update, and review information.
Using Notion + NotionApps, any business can transform its Notion databases into a flexible, responsive app, accessible on both mobile and desktop devices, without any coding required. Notion stores all underlying data (relationships, files, statuses), while NotionApps builds the tailored layers needed for screens, forms, user permissions, and powerful filters.
To get started, you’ll want to set up structured Notion databases tailored to fit your specific field operations. Depending on the nature of your field work, these could include anything from service requests and inspection logs to asset lists, project milestones, or customer interactions. For this guide, we’ll use examples such as Employees/Users, Orders, Tasks, Appointments, Product Catalogue, and Accounts.
Make sure each database captures key details relevant to your workflow (like Title/Name, Client/Customer, Dates, Status, Quantities, Price, Files, and Notes), feel free to adjust fields to match your operational needs.
Step 1: Build the App from Your Databases
Login to NotionApps and Click on “Create New App”.
Choose your databases (Orders, Tasks, Appointments, Product Catalogue, Accounts, Employees).
Click Build App.
Step 2: Set App Identity in Settings
Open Settings in the app.
Rename the app, pick an icon, and update any other identity details.
A clear name & icon help your team recognize the app at a glance.
Step 3: Connect the Users Database
Go to the Users section in the left sidebar and click Select Users Database.
In the pop-up, choose the appropriate users Database.
This lets the app auto-tag actions with the logged-in user for accountability.
This will allow you to create personalized experiences, secure your data with user logins, and set granular permissions to control data access for each user.
Step 4: Remove Old Screens
Go to Screens → Layout, and delete the default screens that were automatically generated from your selected databases. This lets you start fresh and create only the screens you actually need for your app. Go to Screens → Layout and delete all previously made screens so you can build only what you need.
Typical field management screens are:
All Orders – Track and update customer orders.
All Tasks – Assign, update, and monitor field tasks.
Appointments – Schedule and review meetings and site visits.
Catalogue – Manage assets, equipment, or products in the field.
Accounts – Track field team members or partner details.
Step 5: Build “All Orders” (View & Update)
Click New Screen → choose List (Update items) → set Database = Orders.
In Style:
View Type: Grid
Column Size: Small
Screen Name: All Orders
In Data:
Description → Customer (shows customer name)
Caption → Order Date
Color Tag → Status
Turn on Add New Items and Allow Search.
Under Behaviour section: click on Go to Update Screen.
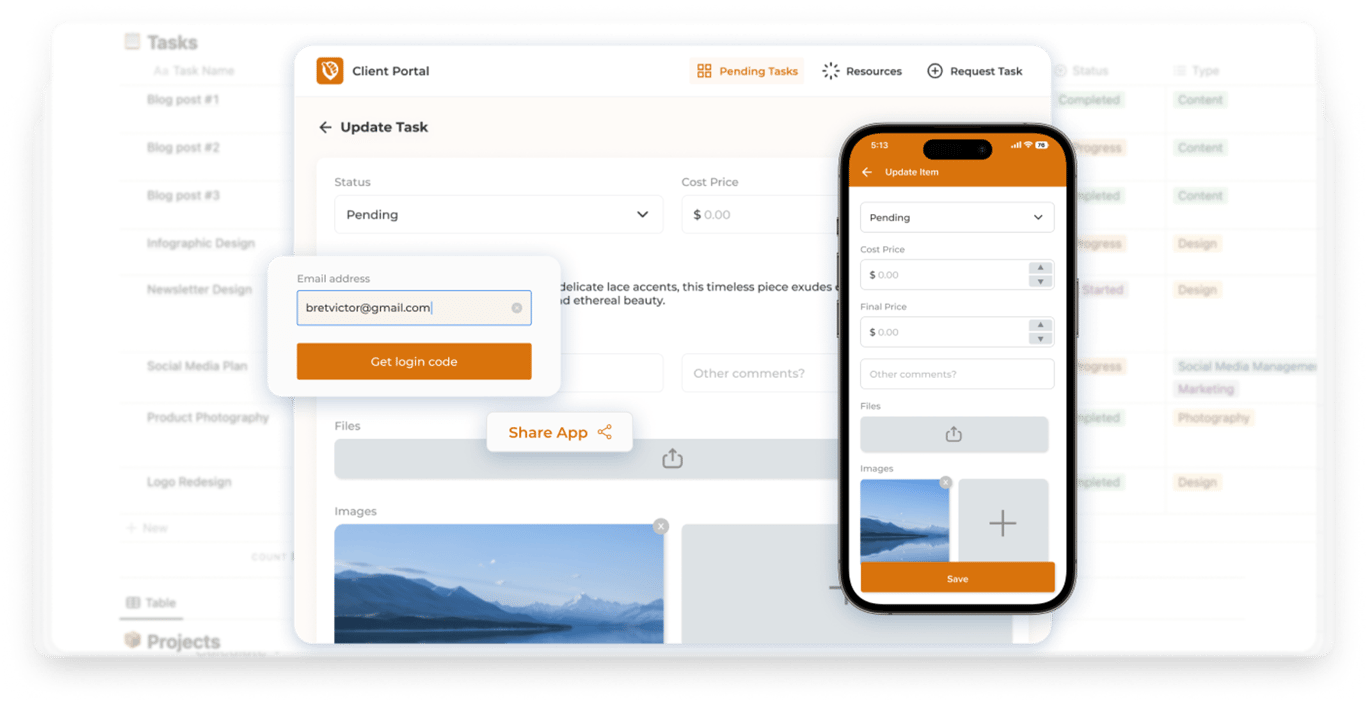
Configure the Update Screen (“Order Details”)
Click ➕ and add these blocks (keep others deleted):
Back to list → Behaviour → Go to Update Screen → rename Account Details (all required).
Add:
View Name (Name as heading, Designation as subheading, Company as caption, Photo as image)
Update Total Sales (Number)
Update Last Sale Value (Number)
Update Total Sales Value (Number)
Update Address (Address Finder)
Update Phone (Number)
Update Email (Text)
Update Status (Dropdown)
Step 10: Update Navigation
Go to Edit Navigation and rename your tabs to match your app’s flow.
Update icons for a more intuitive interface.\
Wrapping It Up
A NotionApps-powered field management solution centralizes data collection, task assignments, and operational visibility. This yields:
Organized dashboards for tracking field performance, orders, and appointments.
Employee-linked task and record updates, driving accountability.
Mobile-friendly forms and screens for on-site teams.
Easy expansion, analytics, asset tracking, client portals, or automated notifications.
Once set up, the system can be scaled for any field operation, equipping teams with actionable data at their fingertips.
💡Pro Tip: NotionApps already offers a ready-to-use Task Tracker template that you can customize to fit your needs, along with many other templates designed for different use cases. You can access all templates through this link🔗
FAQs
What is NotionApps?
NotionApps is a no-code tool that transforms Notion databases into customizable, mobile-friendly apps for managing workflows and data.
What is a Field Management App?
It’s a tool that helps businesses manage tasks, orders, appointments, and client interactions in one place.
Can I build a field management app without coding?
Yes, NotionApps allows you to create field management apps visually, with drag-and-drop components and no coding required.
Why use NotionApps for field management?
NotionApps makes your Notion databases work like a real app with user-friendly screens and mobile-friendly features.
Can field teams collect data in the app?
Yes, your field teams can add text, images, videos, and other data directly through the app, synchronized back to Notion.
Is it possible to restrict what data users can see?
Yes, NotionApps supports data restrictions, letting you control user access so each team member only sees relevant information.
Can I customize forms and views in my app?
Absolutely. You can customize forms for data entry and create filtered or sorted views to display exactly the data your team needs.
How do I keep the app data updated?
The app syncs automatically with Notion databases, and you can manually reload data anytime to see the latest updates.
Can I share my field management app with non-Notion users?
Yes, you can share your app via public or private links, allowing access even for users without a Notion account.